
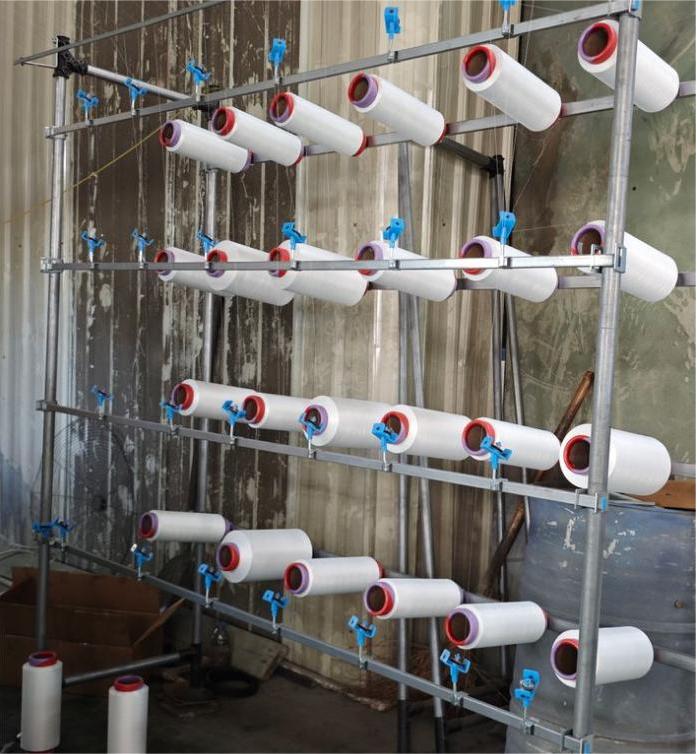
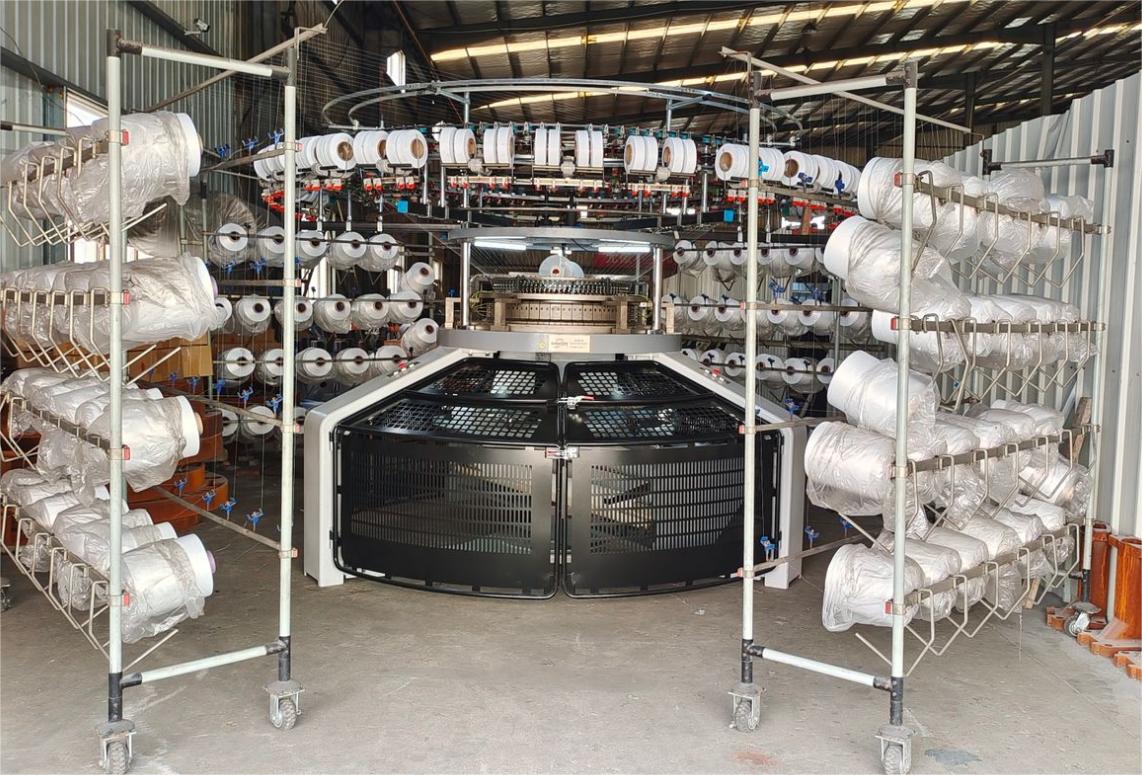
I. Yarn Stand Installation (Creel & Yarn Carrier System)
1. Positioning & Anchoring
• Place the yarn stand 0.8–1.2 meters from the circular knitting machine(https://www.eastinoknittingmachine.com/products/), ensuring at least 600 mm of operator clearance.
• Use a precision level to ensure the vertical rods have a perpendicularity deviation ≤ 0.5 mm/m. Adjust the support feet or vibration isolators if needed.
• Use a torque wrench to diagonally tighten the base bolts to prevent frame warping.
2. Assembly Sequence (Patent-Based Setup Example)
1. Insert the yarn spool beam (12) into the support frame (11), then secure with connector rods (4).
2. Mount the upper yarn rods (3) with the curved surface facing upward. Space yarn hooks (31) approximately 1.2x the number of spools, evenly distributed.
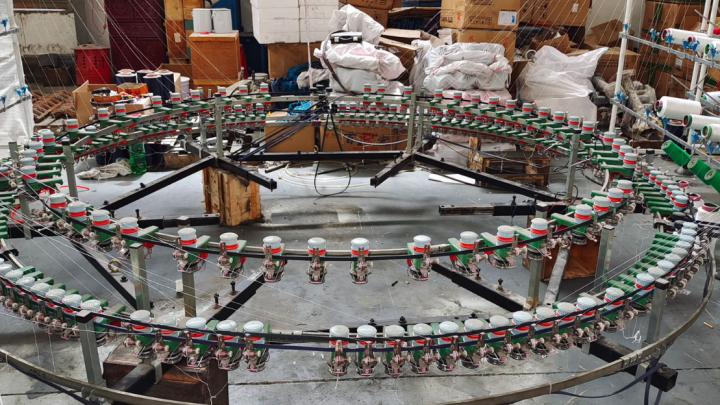
3. Install the guide yarn beam (21). Set the yarn guides (211) with spacing that matches the number of yarn feeders on the knitting machine.
4. Rotate the yarn disc (2114) so the yarn groove (21141) aligns with the feeder mouth. Ensure the rotating shaft (2113) spins freely.
3. Fast Calibration
• Use the string-cross method: stretch a crossline from the knitting machine center to the four corners of the yarn stand. A distance deviation of ≤ 2 mm is acceptable.
• Slightly shake the yarn stand to check for unwanted movement—if stable, it’s ready for loading yarn.
I. Yarn Path Setup (Threading & Feeding Alignment)
1. Standard Threading Layout
Yarn travels as follows:
Yarn cone → Tensioner → Yarn hook / ceramic eye → Yarn break detector → Yarn guide → Yarn feeder on the circular knitting machine.
• Yarn should pass with a wrap angle of 30–45° to avoid stress damage.
• Tensioners on the same tier should be level with each other, within ±2 mm.
2. Tension Adjustments by Yarn Type
• Cotton/Polyester: 3–5 cN; tension plate gap ~2 mm.
• Spandex (Elastane): 0.5–1.5 cN; include anti-entangling rods.
• Filament yarn: 2–4 cN; use ceramic yarn hooks to reduce static.
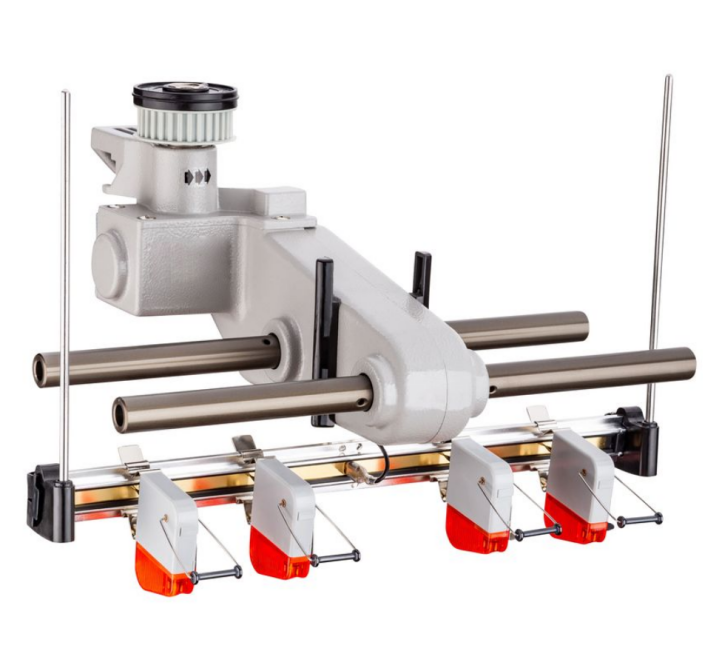
3. Patent-Driven Enhancements (CN208038689U)
• The upper and lower setting rods (1211/1213) form a 10–15° acute angle with the vertical rods, pulling the yarn cone center of gravity inward for smoother unwinding.
• Feed each yarn through a yarn hook (31) before entering the yarn guide to provide double separation—this reduces tangling risk by over 30%.
III. On-Site Debugging Checklist
| Item | Target Standard | Tools Needed
| Yarn stand verticality | ≤ 0.5 mm/m | Precision level
| Yarn guide alignment | ≤ 0.2 mm deviation | Feeler gauge
| Tension consistency | ±0.5 cN between feeders | Digital tension meter
| Dry run (5 mins) | No yarn break / vibration| Visual inspection
IV. Common Issues & Quick Fixes
| Problem | Likely Cause | Solution
| Frequent breaks | Damaged yarn hook or high tension | Replace ceramics, reduce tension
| Yarn entanglement | Cone tilt too steep or guides too far | Reduce angle, shorten guide-to-feeder pat
| Tension mismatch | Uneven cone height | Re-align cone stand height
Conclusion
By following this setup guide, you can complete yarn stand installation and yarn path configuration in under 30 minutes—enabling your circular knitting machine to run smoothly, efficiently, and with minimized downtime. Proper yarn feeding is foundational for high-quality fabric output and optimal knitting machine performance in modern textile operations.
Post time: Jul-24-2025