
Setting up a circular knitting machine properly is the foundation for efficient production and high-quality output. Whether you're a new operator, a technician, or a small-scale textile entrepreneur, this guide offers step-by-step instructions to help you successfully assemble, debug, and operate your machine.
From unpacking components to fine-tuning your production, this article is tailored for your daily workflow—and optimized for today's knitting technology standards.
Why Proper Assembly Matters
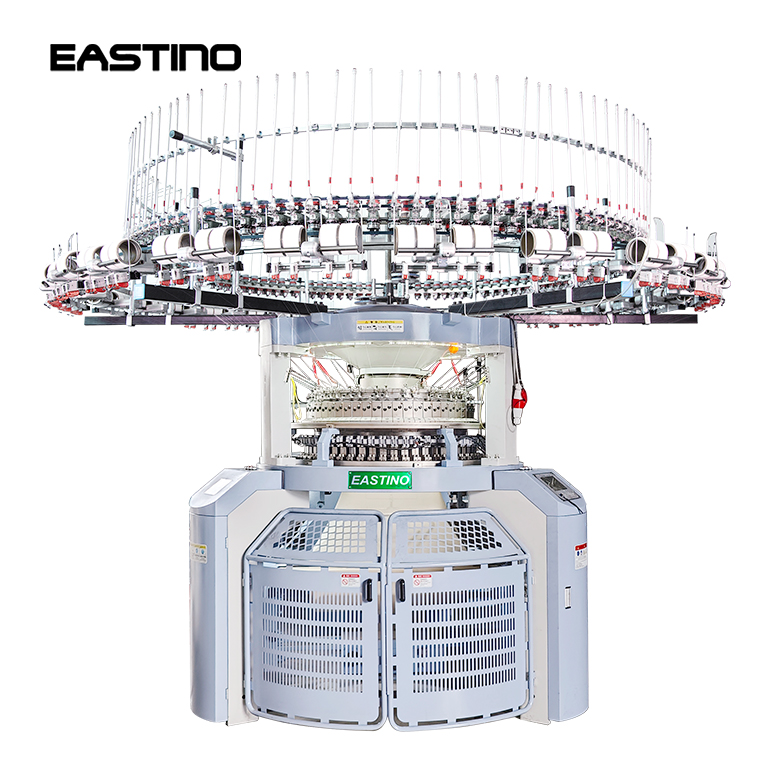
Modern circular knitting machines are precision-built textile machinery. Even the slightest misalignment or improper installation can result in fabric defects, machine damage, or costly downtime. Brands like Mayer & Cie, Terrot, and Fukuhara EASTINO(https://www.eastinoknittingmachine.com/products/) have detailed assembly procedures for a reason: consistency in fabric quality starts with correct machine setup.

Benefits of Proper Assembly:
Maximizes fabric machine efficiency
Prevents needle breakage and gear wear
Ensures consistent fabric loop structure
Reduces waste and downtime
Tools & Workspace Preparation
Before starting, ensure the following:
|
Item |
Purpose |
| Hex key set & screwdrivers | Tightening bolts and securing covers |
| Oil can & cleaning cloth | Lubrication and cleaning during setup |
| Digital tension gauge | Yarn tension setup |
| Leveling tool | Ensures bed stability |
A clean, level, and well-lit workspace is essential. Improper ground alignment can cause vibration and wear in your circular knitting machine over time.
Step 1: Unboxing and Part Verification
Carefully unbox the equipment and use the manufacturer’s checklist to confirm all parts are included:
Needle bed
Cylinder & sinker ring
Yarn carriers
Creel stands
Control panel
Motors and gear units
Check for transit damage. If components like needle cams or dial cams show cracks or misalignments, contact your supplier immediately.
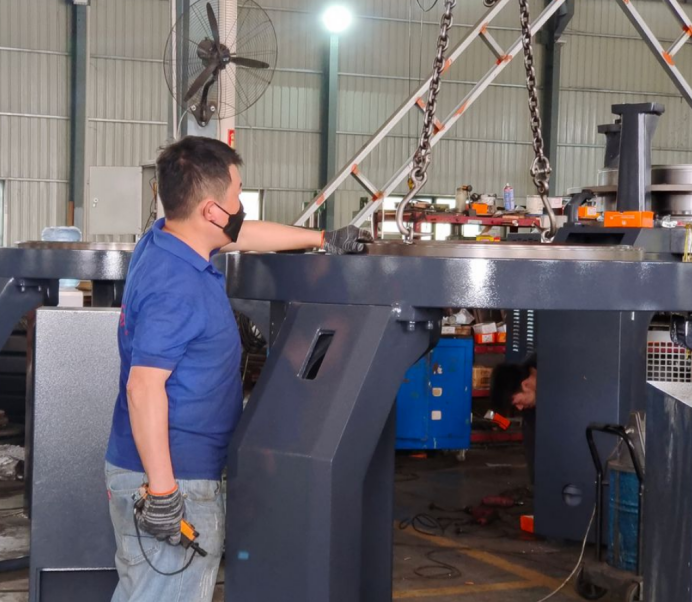
Step 2: Frame and Cylinder Assembly
Place the frame on a level platform and install the main circular knitting cylinder. Use the leveling tool to ensure proper positioning.
Fix the cylinder base with bolts
Insert the sinker ring and check concentricity
Mount the dial plate (if applicable) and rotate manually to test friction
Pro Tip: Avoid overtightening bolts. It can deform the machine frame and misalign the needle tracks.
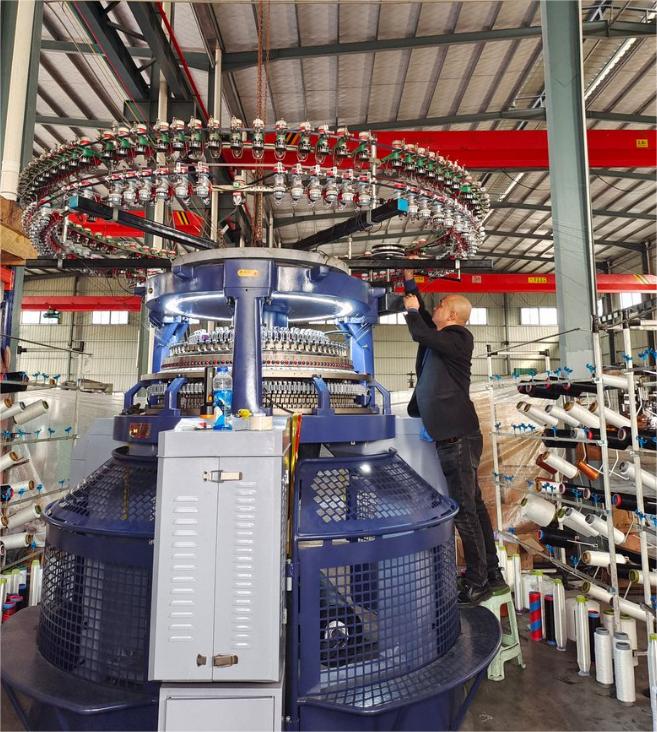
Step 3: Yarn Feeder and Creel Setup
Mount the creel stand and install yarn tensioners according to the yarn types you'll use (cotton, polyester, spandex, etc.). Use the yarn path diagram provided by your fabric machine supplier.
Make sure to:
Keep yarn tensioners clean
Position feeders symmetrically to avoid yarn slippage
Use yarn carrier calibration tools for precision feeding
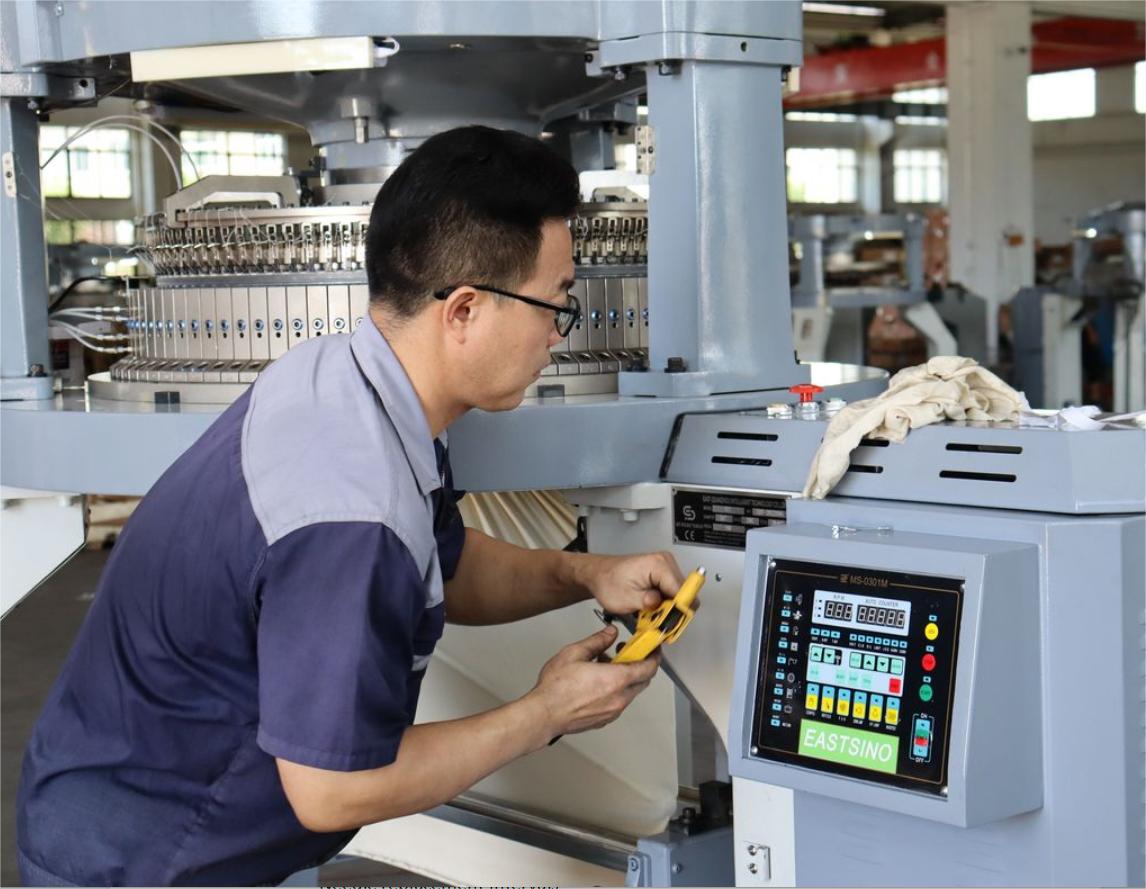
Step 4: Power On and Software Configuration
Connect the machine to the power supply and initialize the control panel. Many circular knitting machines now come with touchscreen PLC interfaces.
Configure:
Knitting program (e.g., jersey, rib, interlock)
Fabric diameter and gauge
Stitch length and take-down speed
Emergency stop parameters
Modern textile machinery often includes auto-calibration options—run those diagnostics before proceeding.
Step 5: Debugging and Initial Test Run
Once assembled, it's time to debug the machine:
Key Debugging Steps:
Dry run: Run the machine without yarn to test motor rotation and sensor feedback
Lubrication: Ensure all moving parts like needle cams and bearings are lubricated
Needle check: Verify that no needle is bent, misaligned, or broken
Yarn path: Simulate yarn flow to check for snag points or misfeeds
Run a small batch using test yarn. Monitor the fabric output for dropped stitches, loop irregularity, or uneven tension.
Step 6: Troubleshooting Common Issues
|
Issue |
Cause |
Fix |
| Dropped stitches | Yarn too tight or needle misaligned | Adjust yarn tension; replace needle |
| Noisy operation | Gear misalignment or dry components | Lubricate and realign gears |
| Fabric curling | Incorrect take-down tension | Rebalance tension settings |
| Yarn breakage | Feeder misalignment | Recalibrate feeder position |
Using a logbook to track machine behavior can help in identifying recurring issues and improving long-term productivity.
Step 7: Maintenance for Longevity
Preventive maintenance ensures your circular knitting machine runs at peak performance. Schedule regular checks on:
Oil levels and lubrication
Needle replacement intervals
Software updates (for digital models)
Belt and motor inspection
Maintenance Tip: Clean the needle bed and sinker ring weekly to prevent lint buildup, which can interfere with the knitting process.
Internal Resources and Further Reading
If you’re exploring more knitting setups or fabric customization guides, check out our related articles:
Top 10 Circular Knitting Machine Brands
Choosing the Right Yarn for Circular Knitting
How to Maintain Textile Machinery for Longevity
Conclusion
Mastering the assembly and debugging of your circular knitting machine is a foundational skill for any serious textile operator. With proper tools, detailed attention, and systematic testing, you can unlock smooth production, minimal waste, and premium fabric output.
Whether you’re running a local knitting mill or launching a new product line, this guide empowers you to get the most from your machine—both today and for years to come.
Post time: Jul-31-2025